
Every Holiday with Evelyn Guide
Sealing Glitter
Because we want the sparkle on the nutcracker—not on the floor, the dog, your husband and every surface in your house until approximately 2047. 😂✨
First Things First
Glitter is a little trickier to seal.
Any clear coating placed over glitter has the potential to change the way light hits those sparkly little pieces. Even a glossy clear coat may soften the sparkle a bit. The goal isn't just finding a clear sealer—it's choosing the right finish for where your project will be displayed and how much sparkle you want to preserve.
My Top Glitter Sealer Options
Here's the important part: these are not all interchangeable. Indoor vs. outdoor use matters—especially with our giant plastic friends. 😂
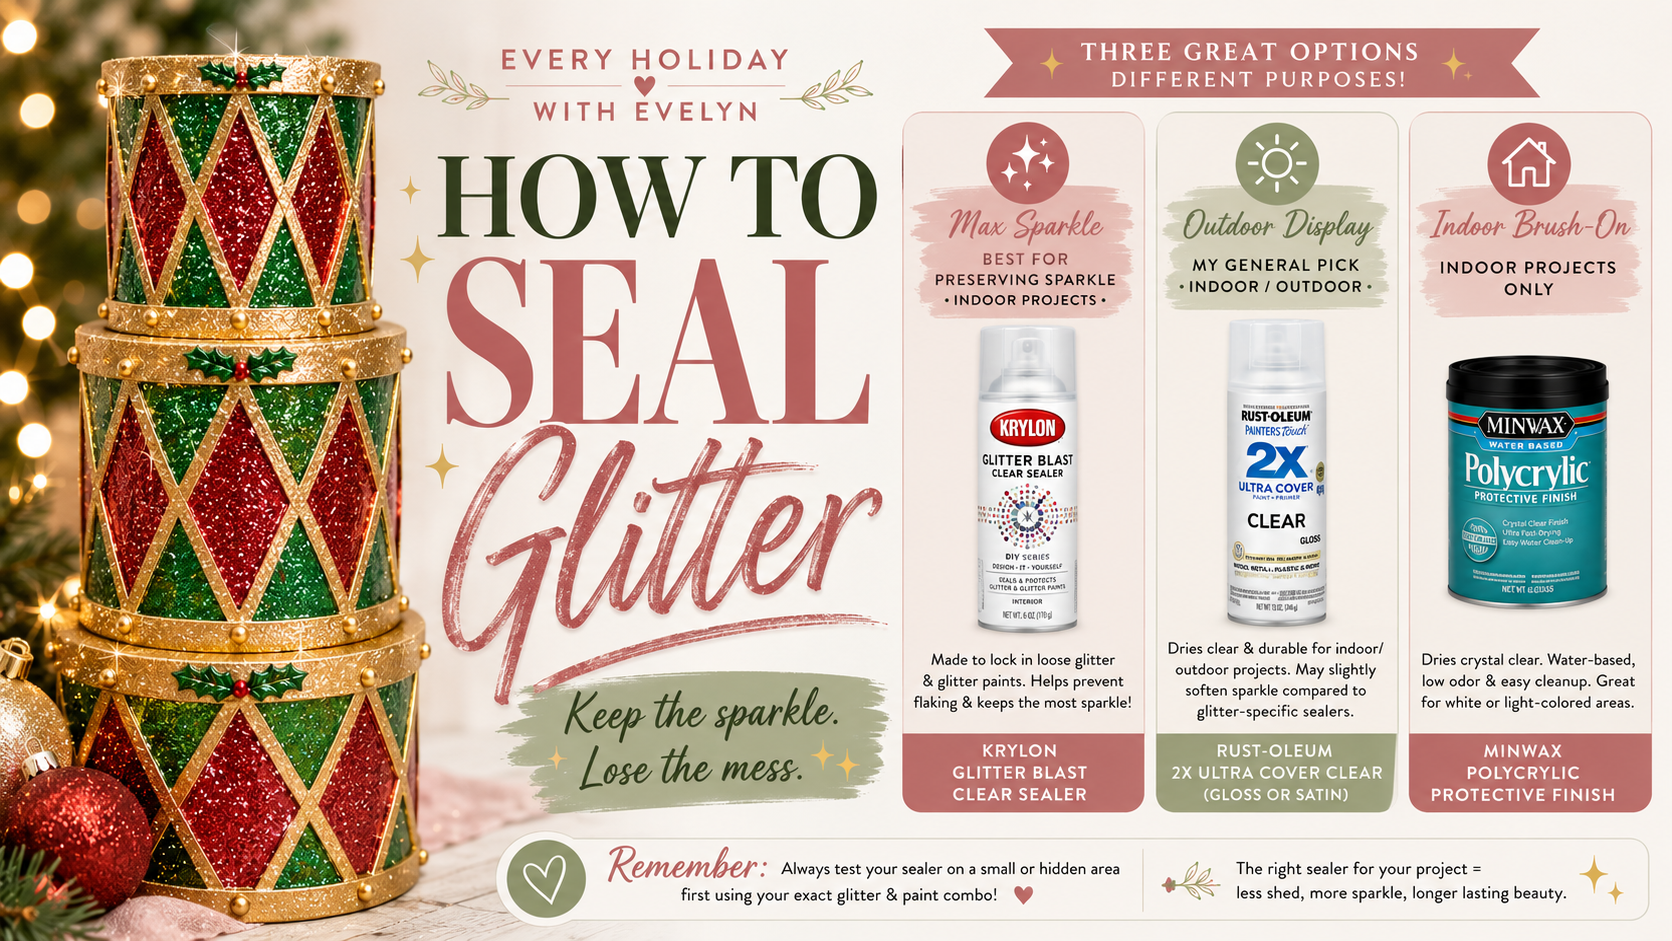
✨ Krylon Glitter Blast Clear Sealer
If your biggest priority is keeping your glitter looking glittery, this is the specialty option I'd look at first for an indoor project.
- Made specifically to help prevent glitter from flaking
- Designed to maintain sparkle and color
- Fast-drying clear sealer
- Can be used on plastic and several other craft surfaces
#WalmartPartner · Affiliate link
✨ Rust-Oleum 2X Ultra Cover Clear
For a project that may be displayed outdoors, this is the more practical general clear spray option of the three listed here.
- Crystal-clear protective finish
- Fast-drying spray application
- Available in multiple clear sheens
- Rust-Oleum lists the 2X Ultra Cover line for indoor/outdoor durability
#WalmartPartner · Affiliate link
✨ Minwax Polycrylic Protective Finish
Polycrylic is a clear, water-based protective finish that can be useful when you're working on an indoor project and want a brush-on clear finish.
- Crystal-clear protective finish
- Water-based formula
- Easy cleanup with warm water
- A clear option to consider around white or light-colored areas
#WalmartPartner · Affiliate link
Okay... So Which One Do I Use?
Here's my very simple version because nobody came here for a chemistry degree. 😂
Maximum Sparkle
For an indoor glitter project, look at Krylon Glitter Blast Clear Sealer first. It's specifically designed to help prevent glitter flaking while maintaining sparkle.
Outdoor Display
Of these three options, I'd look at the Rust-Oleum clear spray for an indoor/outdoor project. Test it over your exact glitter first.
Indoor Brush-On Finish
Polycrylic is the brush-on option here, but keep it on interior projects and follow the manufacturer's surface and application directions.
How I Recommend Sealing Glitter
The biggest mistake is going from “look how sparkly!” to absolutely hosing the entire thing down with clear coat. 😂
Let Everything Dry Completely
Make sure your paint, adhesive and glitter application have fully dried according to the products you're using before adding another finish on top.
Test Your Exact Combination
Glitter, glitter paint, adhesives and clear coats can all behave differently together. Test the sealer on a sample or inconspicuous area before coating the entire project.
Start with a Controlled Coat
Don't immediately bury the glitter under a heavy layer of clear finish. Apply the product according to its label and build the finish only as directed.
Watch the Sparkle Before Adding More
Once the appropriate dry time has passed, look at the finish in good lighting. More clear coat can change the way the glitter reflects light, so don't add extra coats just because you can.
Follow the Actual Product Label
Dry time, recoat windows, ventilation and surface compatibility vary by product. The directions on your exact can or container win over any random craft advice on the internet—including mine. 😂
🚫 What About Mod Podge?
For glittered areas on my blow mold projects, Mod Podge would not be my first choice as the final clear sealer. A brushed-on finish can change the look of the glitter, and I prefer choosing a clear finish based specifically on whether the project is indoors or outdoors. If you do want to experiment with Mod Podge, check the exact formula you're using and test it over your glitter first.
📌 Evelyn's Tip
Seal for the life your nutcracker is actually going to live. 😂
A nutcracker living inside your dining room and a blow mold standing in a Georgia yard are not dealing with the same conditions. Before choosing a sealer, decide where the finished piece will actually be displayed. Then choose a product labeled for that use and test it over your exact paint and glitter combination.
Still Finding Glitter in Places Glitter Has No Business Being? 😂
Come join us. Our nutcracker and blow mold communities are full of painted, glittered and delightfully unhinged holiday projects—and probably several thousand people who also have glitter permanently embedded in their homes.