
Dry Brushing
Dry brushing is one of my favorite tricks for adding depth and making molded details stand out. It works beautifully on fur, hair, wood grain, trim and textured holiday décor.
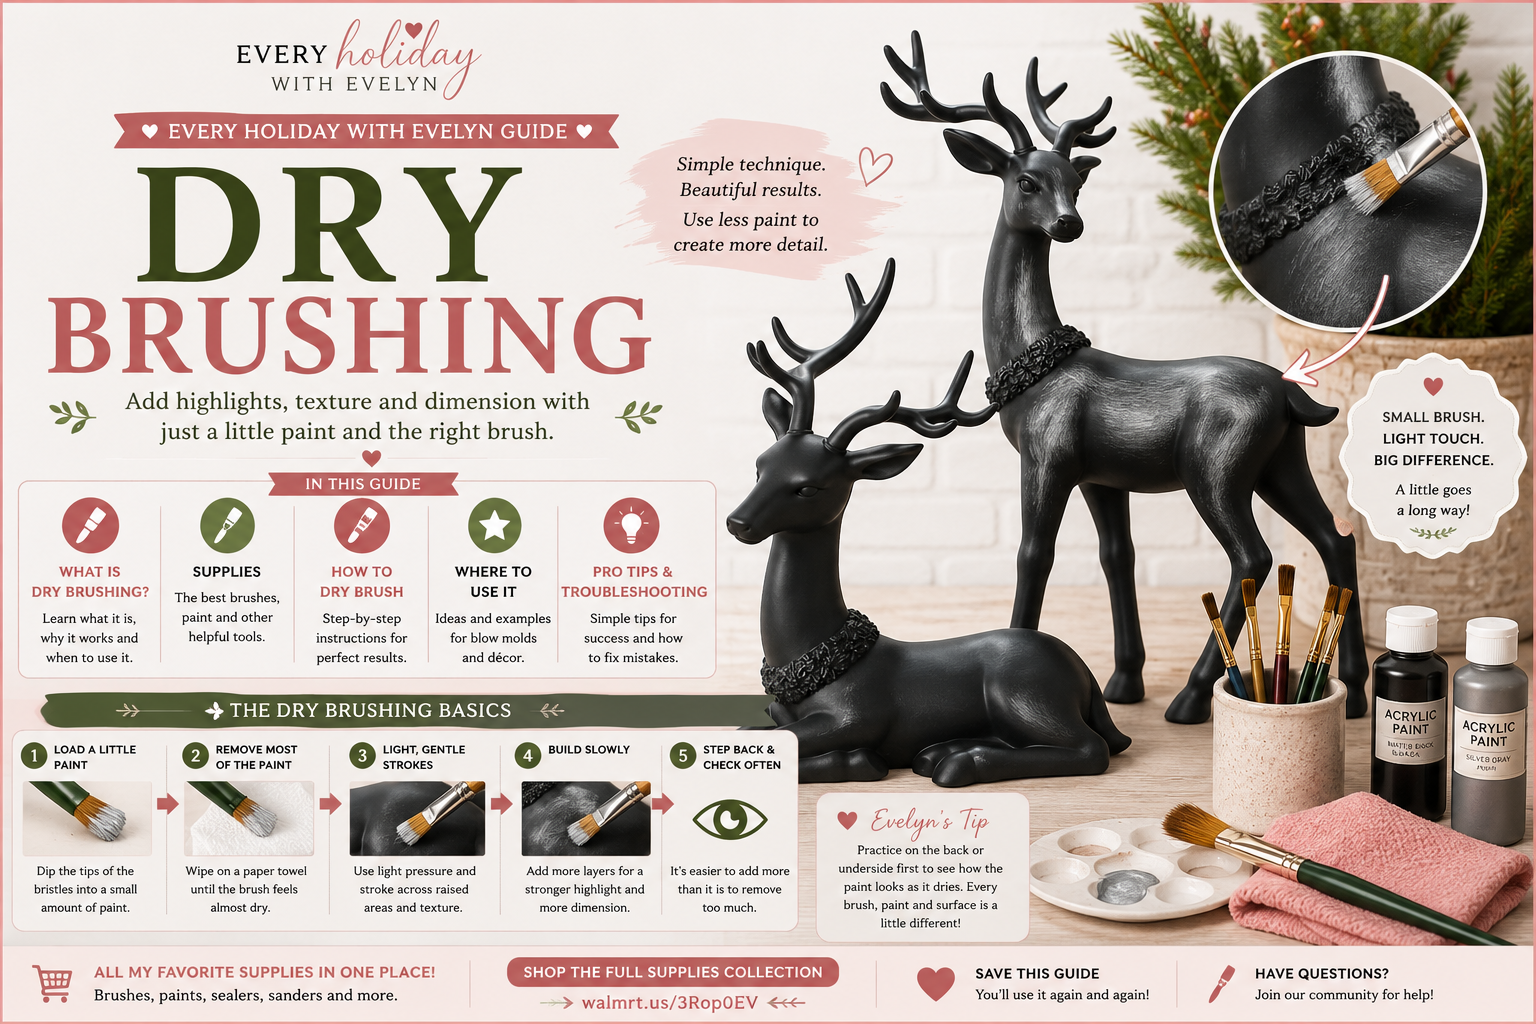
Why dry brushing works
Load a brush with a tiny amount of paint, wipe almost all of it off, then lightly drag it across raised areas.
The high points catch the color while the recessed areas stay darker. That quick contrast makes the details easier to see without covering the base coat.
Just enough paint
- Soft highlights
- Visible texture
- Gradual buildup
- Easy to control
Too much paint
- Heavy streaks
- Covered texture
- Blotchy patches
- Hard edges
Best brushes for dry brushing
Flat brush
Best for larger textured areas, fur and wood grain.
Round brush
Great for beards, wreaths and smaller raised details.
Angled brush
Helpful around trim, edges and tighter spaces.
Older brush
A clean older brush often works perfectly. Just avoid loose bristles.
How to dry brush
Let the base coat cure
Follow the drying directions on your paint before adding highlights.
Dip only the tips
Touch just the ends of the bristles into a small amount of paint.
Wipe off almost all of it
Brush back and forth on a paper towel until the brush looks nearly dry.
Lightly brush the raised areas
Let the brush do the work. You do not need to scrub.
Build it slowly
Add another light pass only where you want more contrast.
Where dry brushing works best
Fur, hair and beards
Adds soft highlights and makes molded strands stand out.
Animal figures
Brings out faces, legs, shoulders and textured collars.
Wood grain and bark
Highlights the grain without covering the darker base color.
Snow and winter details
Creates a soft frosted look on branches, rooftops and wreaths.
Stone, brick and bases
Adds depth with a lighter neutral over a darker base.
Vintage finishes
Cream, tan, bronze or gold can create a softly aged look.
What colors look good over different bases?
Use these combinations as starting points. Test the colors together and let the sample dry before deciding.
| Base color | Dry-brush colors to try | Overall look |
|---|---|---|
| Black | White, light gray, silver, warm white, bronze or antique gold | Frosted, metallic, dramatic or vintage |
| White or cream | Light gray, champagne, blush, pale blue, tan or soft gold | Soft shadows, elegant detail or gentle aging |
| Red | Gold, cream, white, dark red, brown or black | Classic Christmas, candy-cane or distressed |
| Green | Light green, cream, white, gold, tan or brown | Evergreen, snowy, traditional or natural |
| Blue or navy | White, silver, pale blue, light gray or champagne | Winter, frosted, icy or elegant |
| Brown | Cream, tan, gold, gray, black or pale beige | Wood grain, rustic, aged or natural |
| Gray | White, silver, light gray, blue-gray, bronze or black | Stone, concrete, weathered metal or winter |
| Pink | White, cream, blush, champagne, gold or pale gray | Soft vintage, romantic or glam |
| Orange | Brown, cream, tan, dark orange, gold or black | Rustic fall, pumpkin shading or aged warmth |
| Purple | Silver, lavender, white, black, gold or pale pink | Whimsical, Halloween, winter or jewel-toned |
Dry brushing troubleshooting
Do you need to seal dry brushing?
Indoor projects may not need extra protection. Outdoor or frequently handled projects should use a compatible sealer approved for the surface and conditions.
Always test the base paint, dry-brushed paint and sealer together first.
Brushes and paint for dry brushing
Everything you need—including flat brushes, detail brushes and acrylic paint—is in my Blow Mold Painting Supplies collection.
Browse the supply collection
A small mix of brush sizes is usually all you need.
Shop Blow Mold Painting SuppliesThis section contains an affiliate link. Every Holiday with Evelyn may earn a commission from qualifying purchases at no additional cost to you.
Dry brushing FAQ
What kind of paint works best?
Acrylic paint is usually easiest to control. Make sure it is compatible with the base coat and project surface.
Does the brush need to be completely dry?
Yes. A damp brush can thin the paint and push it into recessed areas.
Can I dry brush over metallic paint?
Yes, as long as the paints are compatible and the metallic base has cured. Test first because the highlight may change the shine.
Can I use a sponge instead?
You can, but it creates a more stippled effect. A brush is better for catching narrow raised details.
Can I dry brush more than one color?
Yes. Start with the darker highlight, then add the lightest color sparingly at the end.
Share your project with the community.
Visit the Every Holiday with Evelyn communities for color inspiration, or browse the FAQ library for more painting and decorating help.