

Every Holiday with Evelyn Guide
The Glitter Guide
A simple guide to choosing, applying, and sealing glitter on painted blow molds and holiday decor.
Start Here
Before You Add Glitter
Make sure the painted surface is fully dry, then gather everything you need before opening the glitter.
Let the paint cure
Paint, primer, and repairs should be completely dry before you add adhesive.
Work in small sections
Smaller areas are easier to cover before the Mod Podge begins to set.
Use a catch tray
Place paper or a tray underneath so you can pour the extra glitter back into the container.
Evelyn's Tip
Paint the base a similar color first.
This helps any tiny gaps blend in and makes it easier to get full glitter coverage.
What I Recommend
Choosing the Right Glitter
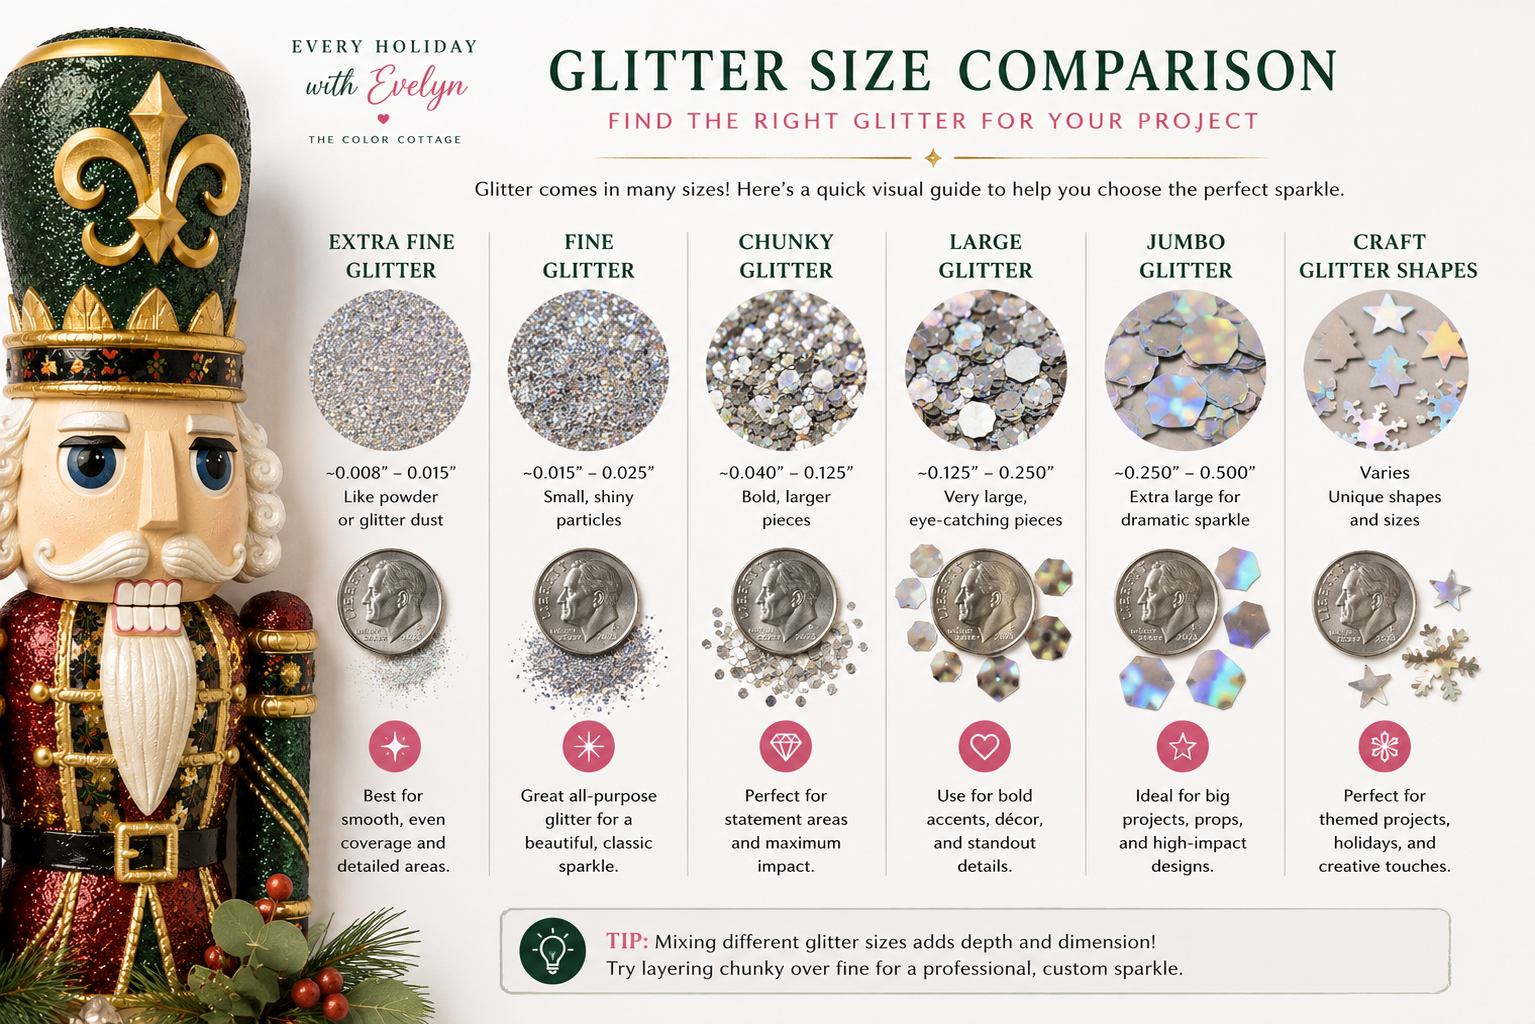
The glitter size will determine how smooth, textured, or bold the finished surface looks.
Fine Glitter
This is my favorite all-around option. It gives you plenty of sparkle without creating a very rough finish.
Extra-Fine Glitter
Use this for lettering, trim, and smaller details where you want smoother coverage.
Chunky Glitter
Choose this when you want a bold, textured finish and the glitter itself to stand out.

My Process
How I Apply Glitter
The most important things are an even adhesive layer, plenty of glitter, and enough drying time.

Apply an even layer of Mod Podge
Cover the area completely without leaving dry spots or heavy puddles.
Pour on plenty of glitter
Cover the adhesive generously. You can return the extra glitter to the container.
Let it dry completely
Do not brush away loose glitter while the adhesive is still wet or soft.
Remove the loose glitter
Use a soft, dry brush and work gently so you do not disturb the attached glitter.
Touch up thin spots
Add more adhesive and glitter only where the coverage needs it, then let it dry again.
Evelyn's Shortcut
Thin Gloss Mod Podge for the topcoat.
Chunky glitter: Start with about one part water to three or four parts Gloss Mod Podge.
Fine or extra-fine glitter: Start with about one part water to two or three parts Gloss Mod Podge.
Add the water slowly. The mixture should brush on smoothly without becoming runny.
Protecting the Finish
Sealing Glitter
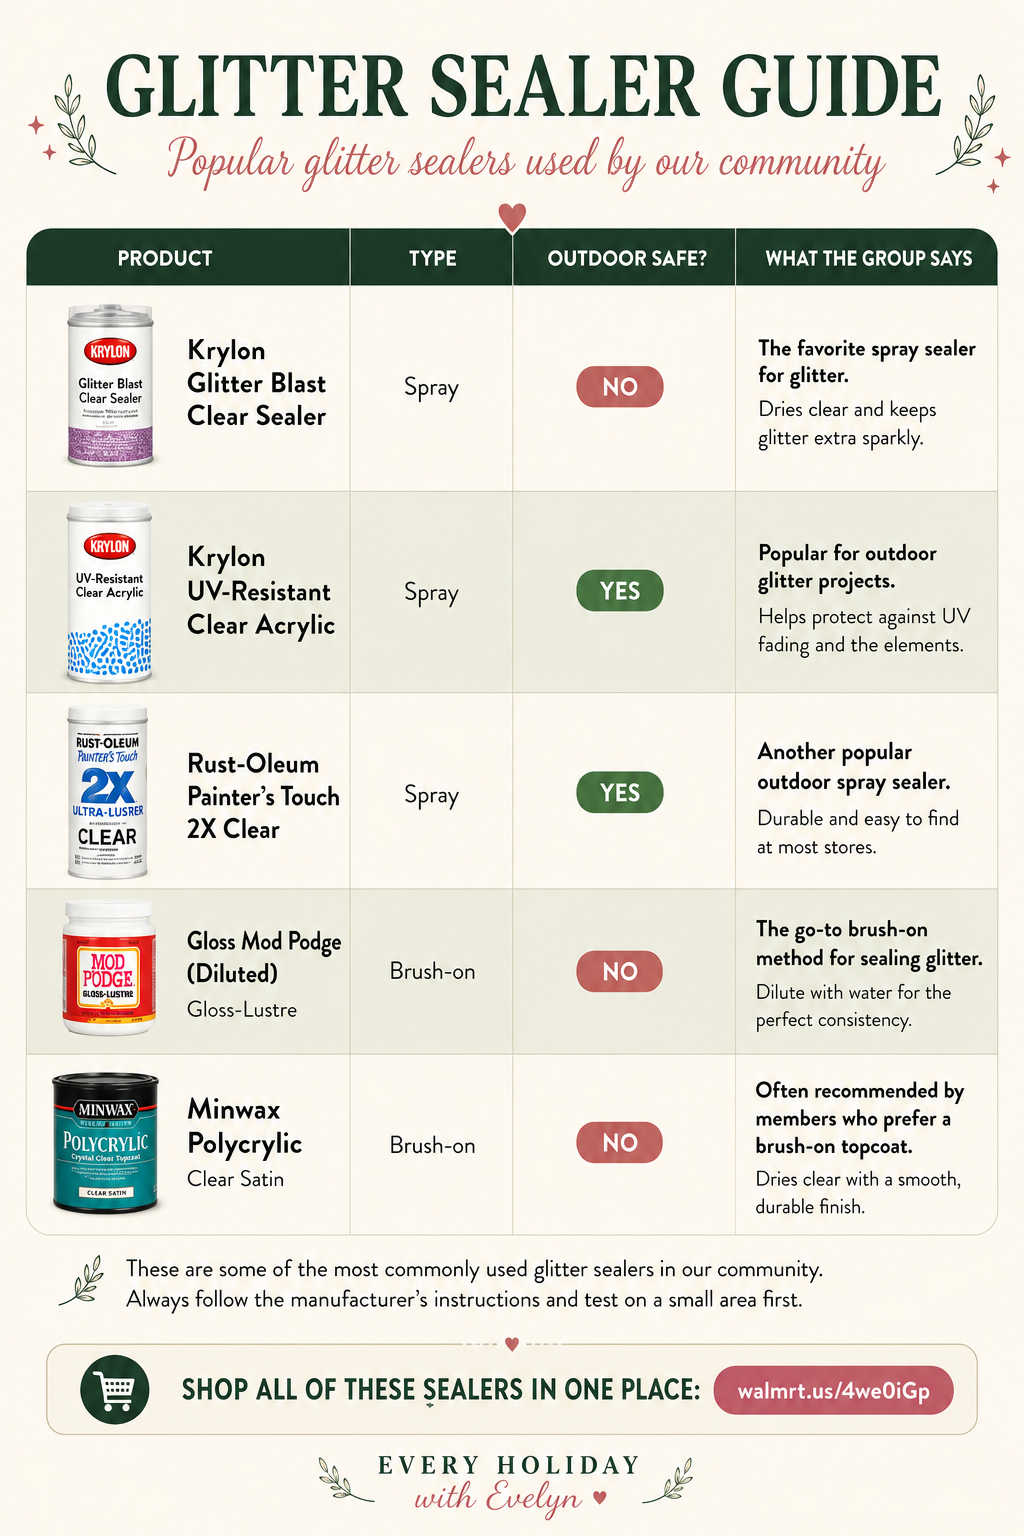
Sealer can reduce shedding and protect the finish, but it may also soften the sparkle.
Maximum sparkle
Leave the glitter unsealed when the piece will not be handled often and appearance matters most.
Less shedding
Use a light gloss topcoat and let it dry before deciding whether another coat is needed.
Outdoor display
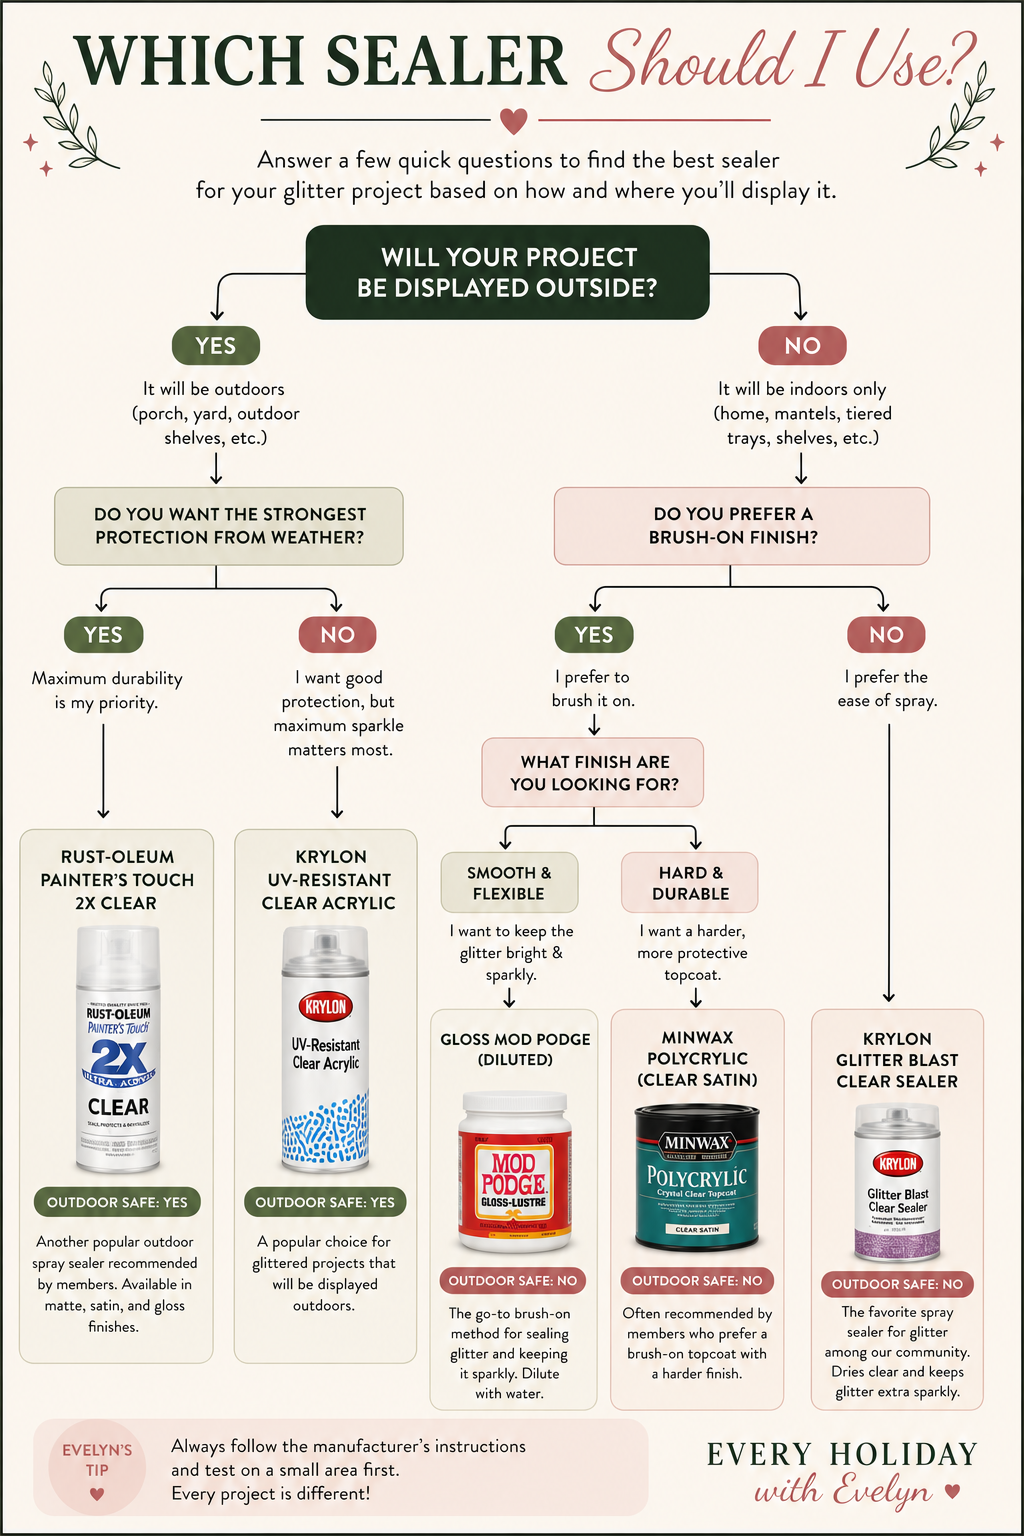
Choose products rated for outdoor conditions, then expect normal wear over time.
What I Recommend
Test the exact combination first.
Glitters and sealers can look very different once dry. Test a hidden area or a sample before coating the whole project.
Common Problems
Glitter Troubleshooting
The glitter looks dull
Let the sealer cure before judging it. Heavy or matte topcoats can reduce the sparkle.
Glitter keeps falling off
Brush away loose glitter, touch up bare spots, and let the adhesive dry fully before sealing.
The Mod Podge looks cloudy
The layer may still be wet underneath. Give it more time, especially in cool or humid conditions.
The surface feels too rough
Chunky glitter will stay textured. For fine glitter, remove all loose pieces before adding a light topcoat.
My Supplies
Shop the Glitter Guide
Here are the sealers mentioned in this guide, along with the rest of my painting resources.
Some links may be affiliate links. I may earn a small commission at no additional cost to you.
Quick Answers
Glitter FAQs
Do I have to seal glitter?
Which glitter should I buy?
Can I use glitter outdoors?
Why did my glitter lose sparkle after sealing?
Can I add another layer of glitter?
Need More Help?
Share your project, ask questions, and get ideas from other holiday decorators in my communities.
Find My Groups